
Produce Music Like a Pro with Pro Tools
Pro Tools is the industry-leading digital audio workstation (DAW) for professional music production. Whether you’re a budding producer or a seasoned audio engineer, this guide will show you how to harness Pro Tools to create studio-quality tracks. We’ll cover everything from getting started with Pro Tools download and Pro Tools free (Intro version) to advanced workflows, plugins, and tips for mixing. By the end, you’ll know why pros swear by Pro Tools and how to use it effectively for your projects.
Pro Tools was first released in 1989 and has evolved continuously; the latest version (2025.6.1) was released in August 2025. It supports both Windows and macOS and is used not just for music creation but also for film sound design, audio post-production, and mastering. In fact, Pro Tools has become so ubiquitous in studios that a recent industry survey notes it “remains the standard in many professional environments”. One survey reports that “Pro Tools is not going anywhere… it remains the most used” DAW by professionals. In short, learning Pro Tools means you’ll be speaking the language of pro studios.
Why Pro Tools is the Industry Standard
Professional recording studio console and monitors this setup is ideal for using a DAW like Pro Tools in music production (image: Pixabay).
Pro Tools has long been the go-to DAW in commercial studios. It offers robust recording, editing, and mixing tools tailored for high-track-count sessions. For example, Pro Tools supports up to 2048 audio tracks (in the Ultimate version) and features real-time plugins for EQ, compression, reverb and more. Its non-destructive, nonlinear editing and powerful automation let you splice and refine takes without losing the original recordings. Avid’s own literature highlights that Pro Tools “includes 60 virtual instruments (thousands of sounds), [and] effects, sound processing, utility plugins… and 75 individual plugins.” (These built-in synths and effects make it easy to sketch ideas without third-party software.)
Pro Tools also integrates hardware interfaces and control surfaces (like consoles and preamp boxes) for professional workflows. Its audio engine uses 32-bit floating-point processing for plugins, with support for up to 192 kHz sample rates. Notably, Pro Tools is a subscription-based platform (with a free Intro version) that receives frequent updates. Since 2015, Avid shifted away from perpetual licenses toward monthly plans. As of 2025, Pro Tools offers four editions: Intro (free), Artist, Studio, and Ultimate. Each tier unlocks more tracks, inputs, and features, which we’ll detail below. (Prior to 2022 there were traditional perpetual licenses, but now everything is via subscription or the free Intro tier.)
In practice, Pro Tools excels when deadlines, collaboration, and high track counts matter. If you’ve ever watched a movie being mixed, or stood in a hit-making recording studio, chances are Pro Tools was being used behind the scenes. Its dominance is why it’s been inducted into the TECnology Hall of Fame and why a huge ecosystem of tutorial videos and certified training exists for it. In the next sections, we’ll walk through how to start using Pro Tools, what each version offers, and how to make the most of its powerful features.
Getting Started with Pro Tools
Starting with Pro Tools is straightforward but involves a few key steps. First, download and install the software: Visit the Avid website (the official Pro Tools page) and log in or create an Avid account. You’ll need an iLok account (free) and the iLok License Manager app to manage your Pro Tools license key. Avid provides installers for each Pro Tools edition (Intro, Artist, Studio, Ultimate) on their site. After downloading, run the installer and activate Pro Tools with your Avid/iLok credentials.
Once installed, open Pro Tools and create a new session. Pro Tools will ask you to choose a sample rate, bit depth (32-bit float is standard), and enable track inputs. It’s helpful to connect any audio interface now and calibrate your monitoring. For beginners, Pro Tools Intro is a great way to start without buying anything – it’s fully free and lets you record up to 8 audio/MIDI tracks simultaneously. (Just remember that Intro has limitations: only 4 physical inputs, 8 voices, and fewer editing tools.) If you need more horsepower, you can upgrade to Pro Tools Artist or Studio via subscription.
Steps to get started:
- 1. Set up your computer: Ensure you meet the Pro Tools system requirements (see below). Update your OS (Pro Tools supports macOS Ventura/Monterey and Windows 10/11) and install the latest Avid Link app.
- 2. Download Pro Tools: Log into Avid with your account, select the edition you want (or free Intro), and download the installer.
- 3. Install and activate: Run the installer. Launch Pro Tools and use the Avid Link or iLok License Manager to activate your subscription or free license.
- 4. Create a session: In Pro Tools, go to File > New Session. Name your project, set the parameters (sample rate, bit depth), and save.
- 5. Configure I/O: In Setup > Playback Engine, select your audio interface. Use I/O Setup to assign input/output paths. This ensures your mics, instruments, and monitors are routed correctly.
- 6. Start recording or importing: Click the record button on audio tracks and start playing/miking, or drag in existing audio/MIDI files.
For help, Avid offers official tutorials on installing and using Pro Tools (search “Pro Tools tutorials” on Avid’s site or YouTube). There’s also a large community forum and many beginner walkthroughs online. Once your session is running, you’ll see the familiar timeline display: audio waveforms, MIDI lanes, a mixer, and edit tools.
Pro Tools Versions: From Intro to Ultimate
Avid now offers four main Pro Tools editions (three paid, one free) to fit different needs. Knowing the differences can help you choose:
- Pro Tools Intro (Free) – Ideal for complete beginners or those wanting to try Pro Tools. It supports 8 audio tracks (mono/stereo), 4 simultaneous recording inputs, and 8 MIDI tracks. Intro includes a basic plugin bundle and simple editing tools. It lacks advanced features like surround mixing or multi-system link. In short, you can get comfortable recording and mixing small projects at no cost.
- Pro Tools Artist ($9.99/mo) – The first paid tier adds more power. Artist expands to 32 audio tracks, 16 inputs, and 64 MIDI tracks. You get Avid’s Artist plugin bundle (around 100 instruments/effects) and more editing tools (e.g. elastic audio, MIDI editing). Artist is aimed at home studios and budding producers. It’s a subscription (monthly/yearly) and includes 1 GB cloud storage.
- Pro Tools Studio ($39.99/mo) – This mid-tier unlocks much larger projects. Studio supports up to 512 audio tracks and 64 inputs, with full surround sound capabilities (up to 7.1.2 Atmos) and advanced editing (e.g. video editing, ARA 2 for Melodyne). You also get unlimited MIDI tracks and the complete plugin bundle. Studio is common for serious project studios and independent producers.
- Pro Tools Ultimate ($99.99/mo) The top end (formerly called Flex) is meant for high-end post and music work. Ultimate (Pro Tools Ultimate) supports 2048 audio tracks and 256 inputs, plus the ultimate plugin collection and features like Satellite Link (sync up to 12 systems) and full Dolby Atmos mixing support. This edition matches what commercial studios use for large sessions and film mixing.
Each tier includes the previous tier’s features plus more. You can switch subscriptions at any time. There’s also a special version called Pro Tools Ultimate (perpetual) for one-time purchase (though it’s more common to subscribe now). If you’re on a budget, start with Pro Tools Intro to learn the basics, then upgrade as needed. Many beginners use Intro or Artist first, since they include core DAW functionality without the higher cost of Studio/Ultimate.
Key Features of Pro Tools
Pro Tools’s feature set is what makes it professional-grade. Here are some highlights:
- Multitrack Recording & Editing: Pro Tools can record many tracks at once and edit them easily. Its non-linear slip/spot/grid modes let you align clips precisely. You can comp together multiple takes, split and fade audio, and quantize MIDI performances.
- Powerful Mixer and Automation: The mixer resembles a console with faders, pans, sends and inserts. You can automate nearly every parameter (volume, pan, plugin knobs) for dynamic mixes. Real-time panning, automation lanes, and grouping (VCA faders) streamline large sessions.
- Built-in Instruments & Effects: As noted above, Pro Tools comes with dozens of instruments (drums, keys, synths) and plugins. Everything from virtual pianos to drum machines are included, plus stock EQs, compressors, delays, reverbs, and more. The AAX plugin format powers all Pro Tools native plugins (and many third-party ones). You can also run Waves, Native Instruments Komplete, and other AAX-compatible plugins.
- Elastic Audio & MIDI: Pro Tools can stretch audio for tempo matching or pitch changes. Its Elastic Audio and Elastic Pitch let you correct timing or tuning after recording. For MIDI, Pro Tools supports advanced MIDI editing (piano roll, step input) and MIDI to Audio conversion.
- Video Support: Unique among DAWs, Pro Tools tightly integrates video. You can import HD or 4K video (QuickTime, MXF, etc.) and do ADR/dialogue recording, sound design or scoring directly. Time code, tempo maps, and elastic audio work alongside the film timeline. Pro Tools also supports Dolby Atmos and Ambisonics for VR/audio post.
- Collaboration & Cloud: Pro Tools allows cloud collaboration on sessions (Avid Cloud Collaboration), so multiple people can work on the same project remotely. It includes simple file sharing and version tracking, which is great for team workflows.
- Advanced Editing Tools: Pro Tools has useful tools like Beat Detective (for fixing timing) and Elastic Time/Pitch. It also supports ARA 2 (Audio Random Access) for closer integration with Melodyne. The Smart Tool lets you trim and fade audio with one pointer.
- Session Data Compatibility: You can open Pro Tools sessions on any machine with the same software. It also supports importing/exporting AAF/OMF for moving sessions between DAWs and video editing suites.
In practice, producers love how Pro Tools handles large sessions. For example, Pro Tools Ultimate allows up to 2048 simultaneous tracks, which is essentially unlimited for modern projects. Even the entry-level Artist edition gives you a whopping 32 tracks, which is more than enough for most songs. The tight integration of MIDI and audio also helps, so you can compose on software instruments and mix recorded vocals all in one place.
Pro Tools vs Other DAWs (Logic, Ableton, etc.)
Pro Tools vs Logic Pro X: One common question is how Pro Tools compares to Apple’s Logic. There are key differences: Pro Tools runs on both Mac and Windows, whereas Logic Pro X is Mac-only. Logic is sold as a one-time purchase (~$199) while Pro Tools uses subscriptions. In general, Pro Tools (especially the Studio/Ultimate tiers) is more prevalent in big studios and post-production, while Logic (and its bundled instruments) is popular among singer-songwriters and home studios. Functionally, both can record and mix music very well, but Logic has more built-in virtual instruments and patterns, whereas Pro Tools excels in audio editing precision and compatibility with pro studio gear. Some beginners find Logic’s interface friendlier at first, but many pros stick with Pro Tools for its standardized workflows.
Other DAWs: Each DAW has its strengths. For example, Ableton Live is favored for electronic music and live performance, Cubase and FL Studio are popular with composers, and Reaper is loved by power users for customization. However, production experts note that in post-production and commercial studio contexts, “Pro Tools remains the standard”. In practical terms, if you plan to work in film scoring or session work, learning Pro Tools will make you versatile. Conversely, Logic (and others like Studio One or Nuendo) are common in music production. Ultimately, DAW choice can be a matter of personal workflow preference, but Pro Tools’s broad industry acceptance is hard to beat.
Choosing for beginners: If you’re just starting, you might try Pro Tools Intro (free) and Logic Lite/Express to get a feel for each. Many producers even use multiple DAWs (e.g. composing in Logic, mixing in Pro Tools). Just be aware: Pro Tools plugins use the AAX format, so presets or libraries in Logic (AU format) won’t open directly; likewise, Logic’s virtual instruments won’t run in Pro Tools. But third-party plugin bundles (Waves, iZotope, etc.) often offer AAX versions for use in Pro Tools.
Pro Tools Plugins and Instruments
A major strength of Pro Tools is its native plugins and instrument library. As mentioned, Pro Tools “includes 60 virtual instruments (thousands of sounds) and 75 individual plugins”. These cover synthesizers, samplers, drum kits, keyboards, and orchestral instruments for composing all kinds of music. For effects, it has professional-grade EQs, compressors, limiters, delays, reverbs, saturations, modulation effects and more. For example, Avid’s stock Pro Tools bundles include emulations of classic gear and useful tools like the AIR Creative Collection of instruments.
Beyond built-ins, Pro Tools supports AAX plugins (Avid Audio eXtension). There’s a huge ecosystem of AAX plug-ins: major companies like Waves, Universal Audio, FabFilter, iZotope, and many others create AAX versions. This means you can drop in anything from analog tape emulators to modern synths. (Note: unlike some other DAWs, Pro Tools does not support VST or AU natively, only AAX. But most plugin makers offer AAX versions.) Pro Tools also includes features like HEAT, an analog saturation effect introduced in later versions, which lets you “tape saturate” your entire mix for warmth.
Use the Plug-In Manager in Pro Tools to organize your effects and instruments. You can create favorite lists or categories. Also use Virtual Instruments tracks (under the Track menu) to load synths, and Aux tracks for return effects. Remember to install any drivers or authorization for third-party plugins you acquire.
Pro Tools’s support for MIDI controllers and surfaces (e.g. Avid’s own Artist Mix or S6) also extends to plugin control. In other words, you can assign knobs on a hardware controller to tweak plugins in real-time, making mixing more tactile.
Pro Tools System Requirements
To run Pro Tools smoothly, your computer needs to be robust. Avid’s official requirements (updated Oct 2025) recommend:
- macOS: Latest macOS (e.g. Monterey 12.x, Ventura 13.x, Sonoma 14.x or above) on an Apple Silicon (M1/M2/M3) or Intel Core i5 (or higher) machine. Pro Tools 2025+ even supports macOS “Tahoe” 26.0.x.
- Windows: Windows 10 (22H2) or Windows 11 (latest update) on an Intel 64-bit CPU (Core i3 2GHz or faster recommended). A machine with a fast multi-core CPU (Core i5/i7 or AMD equivalent) is ideal.
- Memory: At least 16 GB RAM is recommended. Large sessions (hundreds of tracks) can use much more, so if you plan big projects, 32+ GB is better.
- Storage: SSD drives are highly recommended for audio recording. You should have one SSD for the OS/applications and a separate, fast drive (HDD or SSD) formatted to APFS (Mac) or NTFS (Windows) dedicated to your audio sessions. Pro Tools also needs about 15 GB free for installation.
- Interface/Inputs: A compatible audio interface is necessary. Any Core Audio (Mac) or ASIO (Windows) driver device will work. Pro Tools supports up to 256 simultaneous hardware inputs on Ultimate systems. USB/Thunderbolt interfaces are common; just ensure you have the driver.
- iLok License: While Pro Tools Intro doesn’t require an iLok dongle, the paid versions do. You can use an iLok 2/3 USB dongle or the iLok Cloud for license management. Make sure your computer can connect to the internet to activate licenses.
In summary, a modern workstation-class PC or Mac is needed. The better your CPU and disk speed, the more tracks and plugins you can run without lag. Avid also publishes detailed compatibility charts – always check those if you have very new hardware. Following these specs will ensure Pro Tools performs at its best.
Tutorials and Learning Resources
Because Pro Tools is so popular, there’s a wealth of tutorials and courses available. Avid’s own website has a Getting Started section (videos and docs) that walks new users through installation and basic workflows. Their knowledge base (Avid Learning) also offers manuals and quick start guides. On YouTube, channels like Avid’s official channel or community experts post step-by-step Pro Tools tutorials for beginners. (Try searching “Pro Tools beginner tutorial 2025” for the latest.)
For structured learning, Avid offers certification programs through various training centers. If you prefer books, there are titles like “Pro Tools 202x For Dummies” or “Make Music Now” series. The user manual (installed with the software) is comprehensive, covering everything from menu options to advanced features like Cloud Collaboration and MIDI.
Online communities can also help: the Avid Pro Audio Community forum and subreddits (e.g. r/ProTools) are good places to ask questions. Many producers and engineers share tips on production forums, mixing boards, and social media. For example, Avid’s community support pages link to FAQs and user discussions on common issues.
Lastly, don’t neglect in-app help. Pro Tools has context-sensitive help and tooltips. If you hover over a button or menu item, it often shows a brief description. Use Online Documentation (in the Help menu) for deep dives on any topic.
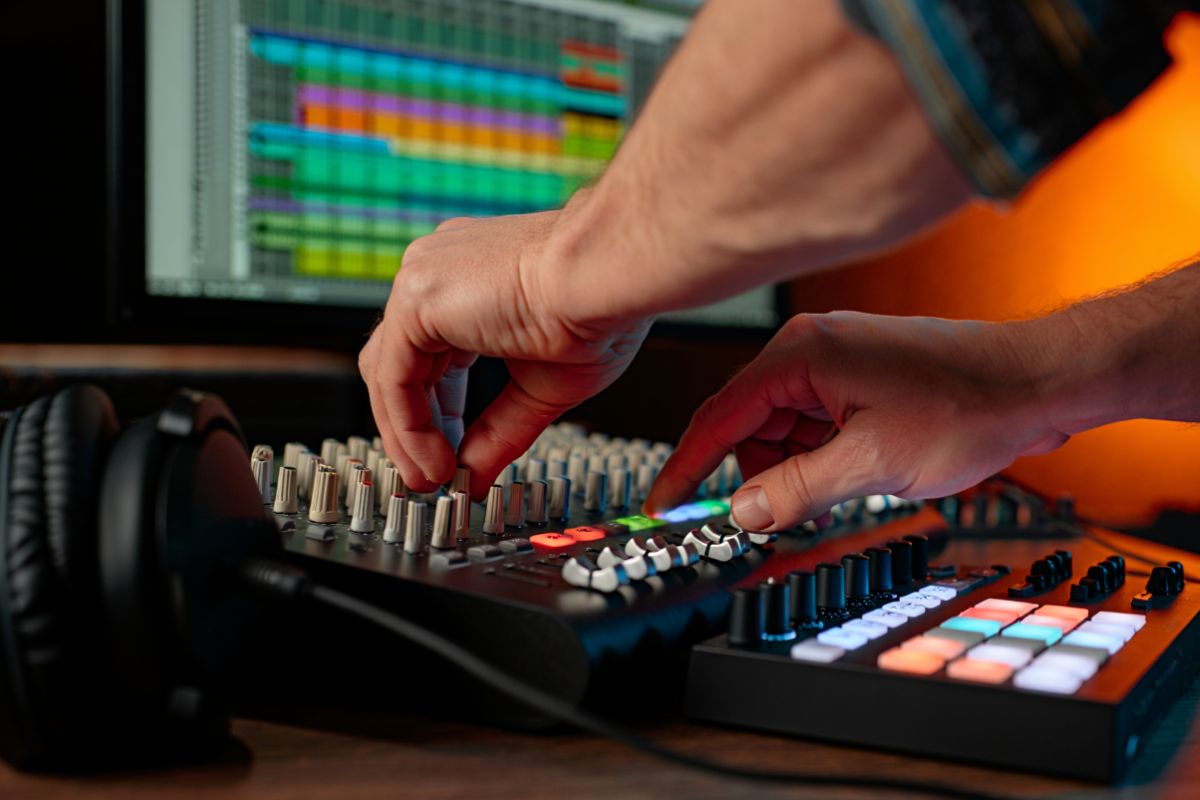
Tips for Producing Music with Pro Tools
A music producer mixing audio on a professional studio console – Pro Tools can control virtual mixing consoles in the DAW to achieve these results (image: Adrian Breakspear Studio).
Here are some practical tips to get the most out of Pro Tools:
- Use Templates: To save time, create a session template (with your favorite track layouts, plugins, and I/O routing). For example, a template with pre-labeled vocal tracks, drum bus, and mastering chain can speed up setup.
- Gain Staging: Before hitting record, set proper levels. Keep faders near unity (0 dB) and avoid clipping the inputs. Good gain staging prevents distortion and gives headroom for mixing.
- Shortcuts and Smart Tool: Learn Pro Tools keyboard shortcuts (e.g. ‘B’ for zoom, ‘E’ for trimmer tool). The Smart Tool (which combines Trim, Selector, and Grabber) adapts based on cursor location – practice using it to quickly cut and fade clips.
- Editing Workflow: Use playlists and take lanes for comping multiple takes on a track. The Waveform Playlist shows all takes superimposed, making it easy to pick the best parts. Use fades at clip boundaries to avoid clicks.
- Mixing: Organize your mix with groups (for drums, vocals, etc.) and use folder tracks for better session navigation. Route instrument tracks to aux buses for group processing (e.g. a drum bus compressor). Employ Plug-in Delay Compensation (enabled by default) so that sample-accurate alignment is maintained when using latency-inducing plugins.
- Use Plugin Snapshots: If you’re tweaking a synthesizer or effect, use the plug-in’s preset menus or Pro Tools plugin chaining to save settings. This is great for A/B testing different plugin settings.
- Monitor Automation: Pro Tools has multiple automation modes (Auto Write, Touch, Latch, Read). Familiarize yourself with Latch (it writes automation as you move faders) and Touch (resets to previous value when you let go) for mix moves.
- Offline Bounce: Use the Bounce to Disk feature for exporting. You can bounce entire mixes, stems, or even individual tracks. The offline bounce (faster-than-real-time) in recent versions is very fast.
- Backup and Versioning: Regularly save and use Save Session As… to create versions (e.g. MySong_v1, v2, etc.). Pro Tools also has a Session File backup folder – check that in Preferences. Back up your work to avoid data loss.
- Leverage Cloud Collaboration: If working with others, invite collaborators to your session via Avid Cloud Collaboration. They can contribute audio/MIDI to your session from anywhere.
By following these practices, your Pro Tools projects will be clean, organized, and professional-sounding. Remember, producing music in Pro Tools is largely the same in principle as in any DAW: record great performances, then edit and mix them tastefully. Pro Tools just provides the high-end tools to do it.
Frequently Asked Questions
What is Pro Tools?
Pro Tools is a digital audio workstation (DAW) developed by Avid Technology. It’s software used for recording, editing, and mixing music and audio. Professionals use it for everything from music production to film post-production. Pro Tools supports audio and MIDI tracks, virtual instruments, and video, making it a complete environment for audio creation.
Is there a free version of Pro Tools?
Yes. Pro Tools Intro is a free version available from Avid. It has limited features (8 tracks, 4 inputs) but is fully functional for learning and basic projects. Avid also often offers free trials of the paid versions (Artist, Studio, Ultimate). To upgrade, you can subscribe to Pro Tools Artist, Studio, or Ultimate for monthly fees. Pro Tools Intro is great for beginners to try out Pro Tools without cost.
How much does Pro Tools cost?
Pro Tools uses a subscription model. As of 2025, plans are roughly: Pro Tools Artist ~$9.99/month, Pro Tools Studio ~$39.99/month, and Pro Tools Ultimate ~$99.99/month. Avid sometimes sells one-year subscriptions at a discounted rate. There used to be perpetual licenses, but now the focus is on subscriptions. Prices may change, so check Avid’s site for current pricing. Remember Pro Tools Intro is free, too.
Can Pro Tools run on Windows and Mac?
Yes. Pro Tools runs on both macOS and Windows. It supports the latest versions of macOS (Monterey, Ventura, Sonoma) and Windows 10 or 11 (64-bit). (In contrast, some DAWs like Logic Pro only run on Mac.) Always verify compatibility on Avid’s site, especially if you have very new OS versions.
What are the system requirements for Pro Tools?
Avid recommends: macOS 12/13/14 or Windows 10/11, a multi-core CPU (Intel i5 or Apple M1+), and at least 16 GB RAM. You also need a fast drive (SSD) with ~15 GB free for install. An internet connection is needed for license activation. For best performance, use a dedicated drive (APFS/NTFS) for audio sessions and keep your OS disk separate. Always check Avid’s latest specs (they update them each release).
How does Pro Tools compare to Logic Pro or Ableton?
Pro Tools and Logic Pro X are both powerful, but have different niches. Pro Tools is cross-platform and subscription-based, while Logic is Mac-only and a one-time purchase. Pro Tools is often preferred in professional studios and for film work, whereas Logic is popular among independent musicians and composers. Ableton Live, by comparison, is geared toward electronic/live performance workflows. Each DAW can technically produce similar results, but Pro Tools is known for its standardized studio workflows, and Logic is known for its built-in virtual instruments. The best choice depends on your needs: Pro Tools for high-end audio post and large-scale projects; Logic or Ableton for rapid music creation and composition.
Where can I find Pro Tools tutorials?
Avid’s official site has beginner guides and videos (Getting Started with Pro Tools). YouTube channels (like the official Avid channel or community creators) have step-by-step tutorials. Search phrases like “Pro Tools tutorial for beginners” or “Pro Tools recording guide”. Additionally, forums (Avid community, Gearspace, Reddit r/ProTools) have tips and Q&A. Many producers also share workflows on blogs. As one example, Production Expert and other music sites publish Pro Tools tips. When starting, it helps to follow along with video tutorials to see the interface in action.
Conclusion
Pro Tools is a professional DAW trusted by studios worldwide. From recording to mixing to mastering, it offers tools that can take your music production to a pro level. In this article, we covered how to get Pro Tools (including the free Intro version), the differences between versions (Artist, Studio, Ultimate), key features and plugins, system requirements, and workflow tips. We also compared Pro Tools to other popular DAWs, and answered common questions about cost and compatibility.
Whether you’re just starting out or upgrading your studio, mastering Pro Tools will put you on par with many pro engineers. Its robust track count, extensive editing capabilities, and high-quality plugin library make it ideal for complex projects. At the same time, features like cloud collaboration and ARA 2 integration keep it modern.
Ready to produce music like a pro? Download Pro Tools and start experimenting. Watch tutorial videos, try out the virtual instruments, and learn the shortcuts. Over time, you’ll build the skills to craft polished, studio-worthy tracks.
Have experience with Pro Tools? Share your tips or questions below. We’d love to hear how you use Pro Tools in your own productions, and what techniques have worked best for you. Keep creating, and good luck with your music!
